Create a lab environment with VirtualBox

VirtualBox is a great tool often used to simulate an entire lab. It could create all need to accomplish this goal for you.
VirtualBox can create multiples Networks and different virtual machines (VMs). On this post, I will show you how to create a simple lab environment step by step.
On this scenario, I’ll use Virtualbox 6 and two type of networks:
Nat Network, it is the main network which will be use to communicate with the ouside world and other VMs.Host-Only Adapter, this network is only used to get access on the VM from your desktop.
Steps
Installation
You need choose your appropiate package from this URL
For ubuntu users:
sudo apt-get update
sudo apt-get install virtualbox
or
wget https://download.virtualbox.org/virtualbox/6.0.14/virtualbox-6.0_6.0.14-133895~Ubuntu~xenial_amd64.deb
sudo dpgk -i virtualbox-6.0_6.0.14-133895~Ubuntu~xenial_amd64.deb
Consider install the VirtualBox Extension Pack from here
Network Configuration
Host Network

By default, VirtualBox already creates a Host-Only Adapter network, which use this CIDR: 192.168.56.0/24.
This network will be use only to communicate with your Host (a.k.a your desktop machine). Also, on this lab environment we need a Nat Network, whch is another kind of network
If you don’t have this adapter, you need to create it with this simple command
VBoxManage hostonlyif create
Nat Network

A Nat network is the main network which will be use to communicate your VM with with the outside world. Virtualbox creates this network using these steps.
E.g. Create the network 10.0.2.0/24 with name natnet
VBoxManage natnetwork add --netname natnet --network "10.0.2.0/24" --enable --dhcp on
VBoxManage natnetwork start --netname natnet
Virtual Machine Setup
Create a VM base
I need to create a VM to use it as base to create other VM’s. In this example, I will use Centos 7 image, and the VM will named centos7
export VM=centos7
VBoxManage createvm --name $VM --ostype RedHat_64 --register
Now, we need to associate the natnetwork created previously with the nic1 interface
VBoxManage modifyvm $VM --nic1 natnetwork --nat-network1 natnet
Create another nic2 type Host-Only Adapter
VBoxManage modifyvm $VM --nic2 hostonly --hostonlyadapter2 vboxnet0
If you want to increase the CPU and Memory, this moment is good to do that
VBoxManage modifyvm $VM --cpus 2 --memory 512
The VM will need a storage, then create a dynamic disk with 10GB and a SATA Controller to attach it
VBoxManage createhd --filename ~/VirtualBox\ VMs/$VM/$VM.vdi --size 10240
VBoxManage storagectl $VM --name "SATA Controller" --add sata --controller IntelAHCI
VBoxManage storageattach $VM --storagectl "SATA Controller" --port 0 --device 0 \
  --type hdd --medium ~/VirtualBox\ VMs/$VM/$VM.vdi
Create a IDE controller to mount the iso installer image in order to begin the installation process. E.g. I will use the CentOS 7 minimal image iso.
Previously you need to download the iso image
mkdir ~/isos/
wget \
  http://centos.usetelecom.com.br/centos/7.7.1908/isos/x86_64/CentOS-7-x86_64-Minimal-1908.iso
  -O ~/isos/
VBoxManage storagectl $VM --name "IDE Controller" --add ide
VBoxManage storageattach $VM --storagectl "IDE Controller" --port 0 \
  --device 0 --type dvddrive --medium ~/isos/CentOS-7-x86_64-Minimal-1908.iso
You could setup others miscellaneous system options
VBoxManage modifyvm $VM --ioapic on
VBoxManage modifyvm $VM --boot1 dvd --boot2 disk --boot3 none --boot4 none
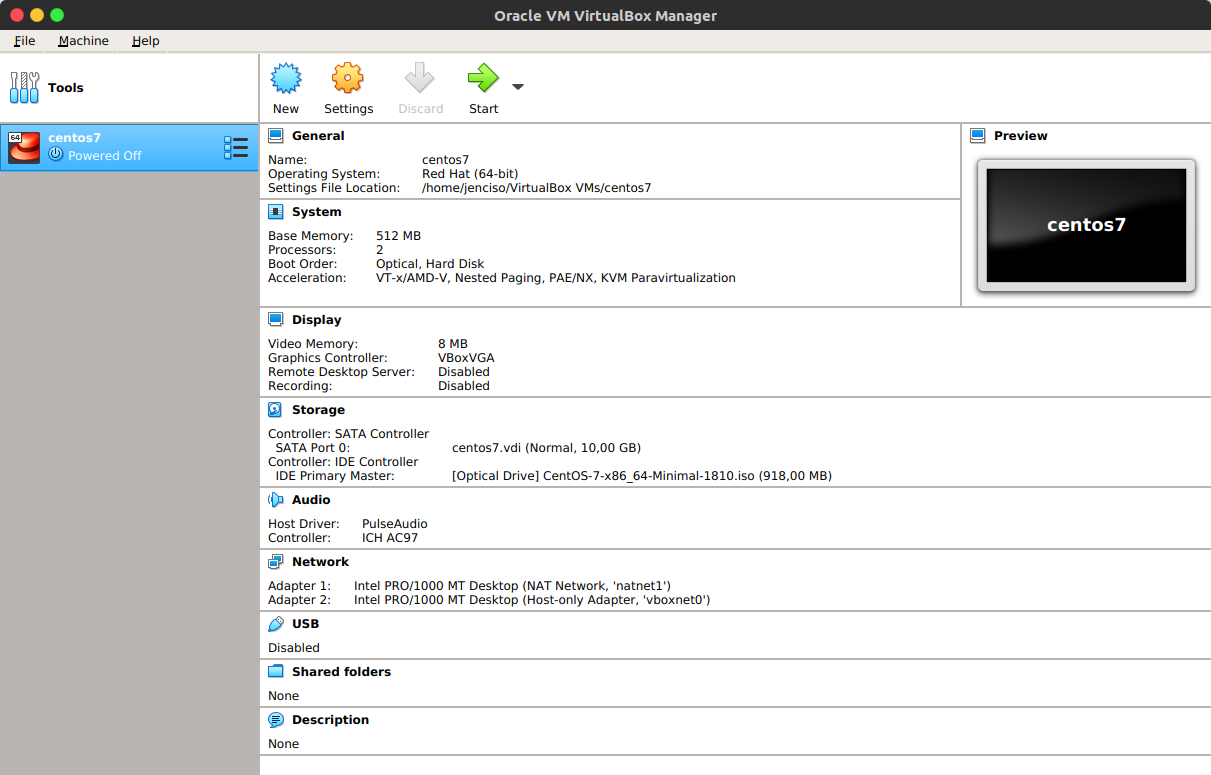
And finally, you have a VM created like this:

To start the VM and begin the installation process, use the follow command:
VBoxManage startvm $VM
Install Centos OS
Start the installation process

Setup your localtime. In my case, as I live in Brazil, it is America/Sao_Paulo

Create a ansible user, and make it Administrator

Also, you need to setup the root password

Finished the installation, login into the VM as root user and edit the first one NIC

You need to pay attention on this variables:
BOOTPROTO=static
ONBOOT=yes
IPADDR=10.0.2.2
PREFIX=24
GATEWAY=10.0.2.1
DNS1=10.0.2.1

Edit the second NIC

Pay attention on this variables
BOOTPROTO=static
DEFROUTE=no
ONBOOT=yes
IPADDR=192.168.56.2
PREFIX=24

Restart the system network service and check the network connectivity
systemctl restart network
ip addr | grep "inet "
ip route

Testing
SSH access to VM from the Host-only Adapter
$ ssh root@192.168.56.2
root@192.168.56.2's password:
Last login: Tue Oct 15 23:10:05 2019 from 192.168.56.1
[root@localhost ~]# ping www.terra.com
PING www.terra.com (208.70.188.57) 56(84) bytes of data.
64 bytes from www.terra.com (208.70.188.57): icmp_seq=1 ttl=53 time=151 ms
64 bytes from www.terra.com (208.70.188.57): icmp_seq=2 ttl=53 time=151 ms
^C
--- www.terra.com ping statistics ---
3 packets transmitted, 2 received, 33% packet loss, time 2002ms
[root@localhost ~]#
Final Step
Once you have configured the operating system, you can shutdown and eject the DVD.
$ ssh root@192.168.56.2
root@192.168.56.2's password:
Last login: Tue Oct 15 23:10:05 2019 from 192.168.56.1
[root@localhost ~]# halt -p
VBoxManage storageattach $VM --storagectl "IDE Controller" --port 0 \
  --device 0 --type dvddrive --medium none
Others usefull commands #
Start in headless mode
VBoxManage startvm $VM --type headless
Remove nat network
VBoxManage natnetwork remove --netname natnet
Disable the dhcp
VBoxManage natnetwork modify --netname natnet --dhcp off
Start the nat network
VBoxManage natnetwork start --netname natnet
Take snapshots
VBoxManage snapshot $VM take <name of snapshot>
Revert snapshot
VBoxManage snapshot $VM restore <name of snapshot>
Delete VM
VBoxManage unregistervm $VM --delete
Sources #
https://www.oracle.com/technical-resources/articles/it-infrastructure/admin-manage-vbox-cli.html
https://www.virtualbox.org/manual/ch08.html
https://www.perkin.org.uk/posts/create-virtualbox-vm-from-the-command-line.html
https://www.nakivo.com/blog/virtualbox-network-setting-guide/
https://www.virtualbox.org/manual/ch06.html
https://www.linuxtechi.com/manage-virtualbox-virtual-machines-command-line/
